Wednesday, December 30, 2009

Creating udev rules on Linux

I spent some time figuring out how to customize behaviour when hot pluging devices on linux, so I might as well post my notes in case I forget. :)

You can use udev to trigger events, to write custom linux scripts for hot plugged device.

Here's one of the more clever ideas with custom hotplug scripts using a standard usb stick as a key to unlock the computer. This will secure a workstation to only the person with the key:

http://raftaman.net/?p=300

Here's a simple example of writing a custom image processor for a camera (most cameras are already supported, but this is an example from the ground up).

Basically what is needed is:

a. figuring out the name of the device on the system
b. figuring out the full signature of the device
c. writing a rule to match the signature
d. writing a program that will be triggered

First you have to figure out the name of the device on the system. When the device is unplugged, take a snapshot of all the device on the system. IMO an easy way is to look at the /sys/ directory. It will contain nodes for all hotplugged devices. First take a snapshot when the device is unplugged.

find /sys > /tmp/dev_out.txt

Then plug in the device, and take another snapshot:

find /sys > /tmp/dev_in.txt

Now you can compare the differences in the two snapshots. Note that one physical device can actually be several devices (for example if it has multiple partitions). You will want a short name.

diff /tmp/dev_out.txt /tmp/dev_in.txt

An alternate way to find the name of device nodes, run this, and plug in device.

udevadm monitor

The name might look like /sys/path/to/device. Then get complete signature of the device:

udevadm info -a -p /sys/path/to/device

Udevadm info starts with the device specified by the devpath and then walks up the chain of parent devices... The complete signature of the device looks like a bunch of gibberish, but it's just key/value pairs:


looking at device '/devices/pci0000:00/0000:00:1f.4/usb2/2-2/2-2:1.0/host13/target13:0:0/13:0:0:0/block/sdc':
KERNEL=="sdc"
SUBSYSTEM=="block"
DRIVER==""
ATTR{range}=="16"
ATTR{ext_range}=="256"
ATTR{removable}=="1"
ATTR{ro}=="0"
ATTR{size}=="429569"
ATTR{capability}=="53"
ATTR{stat}==" 87 996 1083 1820 0 0 0 0 0 1016 1820"

looking at parent device '/devices/pci0000:00/0000:00:1f.4/usb2/2-2/2-2:1.0/host13/target13:0:0/13:0:0:0':
KERNELS=="13:0:0:0"
SUBSYSTEMS=="scsi"
DRIVERS=="sd"
ATTRS{device_blocked}=="0"
ATTRS{type}=="0"
ATTRS{scsi_level}=="0"
ATTRS{vendor}=="VTech "
ATTRS{model}=="Kidizoom "
ATTRS{rev}=="1.21"
ATTRS{state}=="running"
ATTRS{timeout}=="30"
ATTRS{iocounterbits}=="32"
ATTRS{iorequest_cnt}=="0x28a"
ATTRS{iodone_cnt}=="0x28a"
ATTRS{ioerr_cnt}=="0x8"
ATTRS{modalias}=="scsi:t-0x00"
ATTRS{evt_media_change}=="0"
ATTRS{queue_depth}=="1"
ATTRS{queue_type}=="none"
ATTRS{max_sectors}=="240"

looking at parent device '/devices/pci0000:00/0000:00:1f.4/usb2/2-2/2-2:1.0/host13/target13:0:0':
KERNELS=="target13:0:0"
SUBSYSTEMS=="scsi"
DRIVERS==""

...

These two lines should basically describe the device:

ATTRS{vendor}=="VTech "
ATTRS{model}=="Kidizoom "

Forming a rule is basically a matter of picking out a few lines from the complete signature and putting them all on one line seperated with commas. Files go under

/etc/udev/rules.d/

The name of the rule starts with a number (order executed) and ends with .rules
There can only be at most one parent in matching rules.
RUN will trigger a program to execute after device is mounted
ACTION can be "add" or "remove"

# EXAMPLE:
# FILE /etc/udev/rules.d/99-camera-copy.rules
# This will trigger /path/to/your/program
# when the device is plugged in
ACTION=="add", SUBSYSTEM=="block", ATTRS{vendor}=="VTech ", ATTRS{model}=="Kidizoom ", ATTRS{rev}=="1.21", RUN+="/path/to/your/program"

Also, udev will pause until the program called is finished. You can also run the program in the background to return immediately (recommended for longer processes). To detach bash script, enclose it in braces and end with &:


#!/bin/bash
{
echo "hello there" >> /tmp/udev_test.log
} &

All programs will be run as root user (full permissions). To lauch graphical programs as a regular user:

#!/bin/bash
{
# what program to run?
run=picasa
user=`who grep :0\) cut -f 1 -d ' '`
export DISPLAY=:0.0
su $user -c "xhost local:$user; $run"
} &


For more information, here's an older writeup (the tool "udevinfo" has changed to "udevadm info")

http://www.reactivated.net/writing_udev_rules.html


Also, thank you Rcspam for an example of using the kidizoom on Ubuntu 10.04+:
http://rcspamsblogen.blogspot.com/2011/01/kidizoom-and-ubuntu-maverick.html
(English)

Wednesday, December 16, 2009

Understanding "Imaginary" Numbers

In grade school, when I learned about negative numbers, I thought they made a lot of sense. Until I learned that multiplying two negatives make a positive number:

-1 * -1 = 1

I recall this seemed completely backwards, intuitively. And most the class agreed. But the teacher explained to everyone that they were wrong. However, the beauty of math is that it really is just a set of rules, and the rules can be anything as long as they are consistent.

This is just one definition of multiplication. We can imagine a different system of numbers, with a different system of multiplication rules.  And as long as we can make the rules consistent, each system of numbers is just as valid.

One way to think about this is, we can think of two different concepts of "negative" numbers: "fully negative" numbers, and "partially negative" numbers.  Multiplying two "partially negative" numbers will produce a "fully negative" number.  

For example, somewhat like defining short '-' and long '--' negative symbols:

-1 * -1 = --1

IOW, multiplying two "partially negative" 1's will produce a "fully negative 1."

However, if we have two number systems, we of course can't have the same symbol mean two different things or it's hard to read. So we can define the more intuitive '-1' with a special symbol like 'i' (perhaps to stand for something like "intuitive -1").

Then we can connect the two number systems together like:

i * i = -1

Then we can treat 'i' like any other unit of measure. As in: 1i, 2i, 3i, ...

A 'complex number' makes use of both number systems, and can be visualized the same way as two-dimensional XY coordinate system. The difference is that each axis has a different number system attached to it. These can written as a sum:

x = a + bi

The term 'imaginary' is a horribly confusing term though, since these numbers are no more or less imaginary than ordinary negative numbers. If anything, they are based in more intuitive rules about negative numbers.

If anything, you can just think of i as "a more intuitive -1" which follows an alternative multiplication rule: two "intuitive" negative numbers multiplied together equal a "regular" negative number.  This is entirely consistent with the standard rule: two "regular" negatives multiplied together equal a "regular" positive number.

Monday, December 7, 2009

Making sense of bad electronic notation

One thing that used to really bug me about electrical notation is that electron flow is actually going in the opposite direction of the conventional current notation. The current is typically shown moving from the positive terminal to the negative terminal in conventional current notation. However, the electrons are actually moving from the negative to the positive terminal.

The problem is, when Ben Franklin came up with labels 'positive' and 'negative' it was a clever guess. What are the odds of being wrong about current flow? 50/50? By the time people figured out the details, the counter-intuitive notation had firmly cemented itself in electric nomenclature. :)

Anyway, counter-intuitive notation is confusing to me, so I finally came up with a work-around of making sense of conventional diagrams. Instead of thinking of a circuit as an electron-powered device, you can also think of a circuit as a vacuum-powered device. Then the positive terminal has a "surplus of vacuum" as compared to the negative terminal.

If two sealed jars are connected by tube, the difference in air pressure between them represents the voltage. The one with the lowest pressure would be the positive end (which can be seen as driving the system). The actual number of particles flowing through the tube would be the current (amps).

The Amps, Volts and Resistance are somewhat circularly defined. Ideally, a pressure difference of 1 Volt will allow 1 Amp of current (6.242 x 10 ^ 18 charge carriers / sec) to move through a tube with 1 Ohm of resistance.

I suppose, it doesn't really matter as to the direction of the current in a circuit, as long as the notation is consistent. In some cases, it might be easier to visualize something as a vacuum-powered device rather than an electron-powered device. Just like it's sometimes easier to think in terms of 'conductance' vs 'resistance' -- as two sides of the same coin.

Clever Clock Design

"This clock, spotted at Design Miami, features an LCD face playing a 12-hour loop of a man erasing and redrawing the time every minute."

Monday, November 30, 2009

Microsoft Patches -- Conflict of Interest

My wife's mother was having trouble with Windows Vista (64 bit). She said that  Windows installed a couple system updates, then stopped working. Sure enough, I restored the computer to a previous configuration, got everything working. Then Microsoft installed ten updates again, which completely broke the system. It wouldn't even boot. This took several hours to fix.

Seems like this was a widespread problem:

http://www.pcworld.com/article/183335/latest_microsoft_patches_cause_black_screen_of_death.html

I think it's questionable on Microsoft's part, why this broke. Especially since it occurred during the start of the biggest spending week of the year, right before Black Friday. 

Coincidentally, Microsoft just introduced a new product they are wanting to sell: Windows 7. It certainly would be a clever way to drive up sales of new PC's during the spending spree. If they break Vista and XP, a lot of people would just buy a new computer rather than paying the cost of fixing an old one.

Or maybe they just don't know what they are doing.   Neither explanation is good.  :-)

At the very least, there's an inherent conflict of interest in that Microsoft is able to modify software that someone purchased, at the same time they want people to stop using it and buy something else. Since like any company, they assign priorities in terms of what makes the most money.  :-)

Monday, November 2, 2009

Ubuntu Linux 9.10 released!


Ubuntu Linux 9.10 was released over the weekend and I upgraded my computer. The newest version is fantastic. It has thousands of free apps that can be installed with one click, and 2 GB of free storage in the "Ubuntu One" cloud.

http://www.ubuntu.com/products/whatisubuntu/910features

Saturday, October 24, 2009

Origami Tiki Head

Here's a experiment to design a Tiki head. This is just three "eye socket" folds (used in the previous faces):


The back side is looped (by interweaving the folds):

Friday, October 23, 2009

Redman origami puppet (with moving eyes, mouth)

This is another paper origami puppet I designed. I wanted something a little more human looking. What's funny about this one, the eyes blink, and the mouth can be pulled open (straight up/down).

Really, it's not a whole lot different from the previous design. I use the same base fold for creating the eyes ... but instead of making inset sockets, I used diagonal folds for outward eyelids. The nose is basically just the top-half of another eye-socket (from the previous design), and the mouth a long eye-socket. It's just a bunch of eyes. :)
With raised check bones he kinda reminds me of Clint Eastwood.

origami puppet 2 (with moving mouth)

Here's another version with a longer beak. I started off on a narrower strip of paper (cut the paper in half longways) and double folded the ends to be sharper tips.


Here's the puppet from the previous post:

Wednesday, October 21, 2009

Origami bat puppet (with moving mouth)

I wanted to design an origami puppet with a moving mouth. Like a flapping bird, but with a flapping mouth. :)

The interesting thing I discovered about this one, is that the deep inset eyes always look like they are staring at you. It looks something like a cross between a bat, pig or a bird:


To make, start with a standard sheet of letter paper, and fold in half (in the long direction):


Fold up the corners


Fold bottom tip to the center edge:

Fold tip to the bottom

Fold the top tip to meet the bottom tip

Fold up along edge meeting the bottom tip. This is the base of the mouth.


Lightly fold half way to the center, for the hinge of the mouth: Repeat on both sides, top and bottom. This will extend to a moving mouth.


Now fold seven guide lines about a 1/4" spaced, starting around the center line. You can just fold in half (to the center) repeatedly. These will be used for the eyes. It doesn't have to be perfectly sharp ... it can be more of a rounder, organic shape.


Collapse paper along guides (side view)

Lightly pinch the eye corner and create diagonal folds for socket.

Repeat for each corner:


If you want a self-standing sculpture that stares menacingly at you, flip it around and interweave the ends:


Or if you want ears, flip over and fold the outside edge to inside edge. Pull up the compressed folds for an ear. Also, if there's a space between the lips, you can easily pull up the bottom jaw and refold. I also reshaped the bottom jaw to make it pointier (like a bat):


And that's it. Fold along the center crease (or hold the corners of his lips and pull outwards)... and his mouth should move. Here the mouth is closed.


With a little planning, and a longer sheet of paper, you could make a much longer beak (by double-folding sharper top and bottom tips).

Tuesday, August 18, 2009

Sassafras Bonsai

This Sassafras tree was growing in the yard, protected between two metal fence posts.

I had thought about making a tea out of it, but after looking up Sassafras (in Wikipedia) I was surprised that the teas are banned by the FDA because Sassafras contains chemicals that can cause cancer and liver damage. I doubt it's all that harmful, compared to other things, but decided I'd try making it into a bonsai.

The wild plant:


After digging it up. I had to trim the roots down a bit for it to fit in the new container:


It's new home. I'm not sure if it will survive .. it's more or less an experiment. Although I do know Sassafras is pretty sturdy. To propagate it, you can just cut off small branches and plant them.


I'll trim this back a little more after it bounces back from the transplant.

Sunday, August 16, 2009

Bonsai!

Well, the mulberry tree bounced back nicely in in a temporary container. So I completed the pruning and moved it to a bonsai pot. I'm thinking of making this into a cascade style (growing below the side of the container):


The maple tree (below) is still recuperating from the initial transfer.

Friday, July 10, 2009

Starting a siphon without using your lungs (alternative method)

The other day, I ran into a problem draining a pool filled with old water. Siphoning it off with an old garden hose would be easy, but I didn't really want to use my lungs to start it. There were bird feathers floating in the water.

So I started it from the other end. I just used a second garden hose (hooked up to a spigot). I held both hoses together under the water and filled the siphon tube up with running water. Then I separated the hoses underwater. The momentum of the running water will be enough to continue the siphon.

That way at least, you aren't greeted at the other end, by a face full of old bird-bath water. :)

Thursday, July 9, 2009

Windows and Linux security comparison

I use two operating systems: Windows XP and Ubuntu Linux. I still use Windows XP to develop for Microsoft's .Net platform. If I had my choice, I'd never touch Windows with a ten-foot pole.

Here's a short comparison of the unpatched security holes in the operating systems. (These security reports are updated daily).

Code Red: Windows XP ("extremely critical" rating as of 7/9/2009!):
http://secunia.com/advisories/product/22/


Code Yellow-Green: Windows Vista ("less critical" rating as of 7/9/2009!):
http://secunia.com/advisories/product/13223/


Ubuntu Linux 9.04 (no unpatched security holes as of 7/9/2009):
http://secunia.com/advisories/product/21851/


This snapshot is a fairly common view of the three systems. Also, it's worth pointing out, these security holes didn't just pop up. They've been sitting out there the whole time (hopefully unknown) since the release of the software.

Well, now Windows XP is asking me to restart my computer. I'm NOT joking. :)

Tuesday, July 7, 2009

Making DVD backups with Ubuntu Linux 9.04

Note: Despite the threats and FBI warnings at the beginning of a movie, you are allowed to make one copy of every movie you own. It's known as Fair Use.  Just don't sell the movies or make hundreds of copies.

Installing the software:

I'd recommend two packages:

  • k9copy for the ripping the DVD to an iso file, and
  • Brasero for burning it to DVD.
K9copy is nice, because it will compress the movie to under 4GB, to fit on a standard writable DVD. Otherwise, a commercially produced DVD might not fit 1:1 on a writable DVD.

Installing k9copy and brasero isn't too tricky (both are free and in the Ubuntu repositories) . Except you may also need to install ubuntu-restricted-extras (in the Ubuntu repos) and a library libdvdcss2 (from medibuntu repos). The latter will allow reading encrypted discs. For help with Medibuntu repos see: https://help.ubuntu.com/community/Medibuntu

Anyway, after that is installed, it's pretty easy to make backups. I just made a backup of a scratchy disk we got second hand. The disk looked like it was on it's last leg.

Overview

Basically, you insert a DVD, use k9copy to select the titles you want copied, and save it to an iso file. Then use Brasero to burn the iso to another DVD disc. Here are more detailed steps:

Create an iso file from DVD:

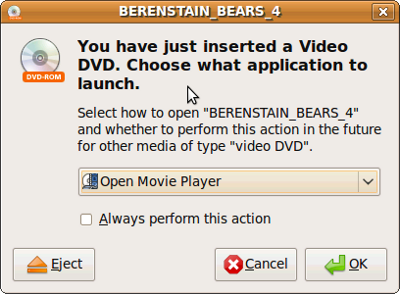
1. Put a DVD in the dvd reader drive. The first time you do this on a new system, you well get a pop up that asks if you want to watch the movie. You can click cancel, or set your preference to "do nothing" when a disk is inserted.


2. Click: Applications -> Sound & Video -> k9copy


3. Click "Open"

If no Title information pops up, the app is probably looking at the another CD/DVD drive. There's a drop down to change this, or you can just remove the disk and try the other drive.

4. Check the first box under Title (to copy all of the dvd). I believe if you want, you can copy a specific chapter/part of the DVD.


5. Click "Copy"


6. Name and save the file.


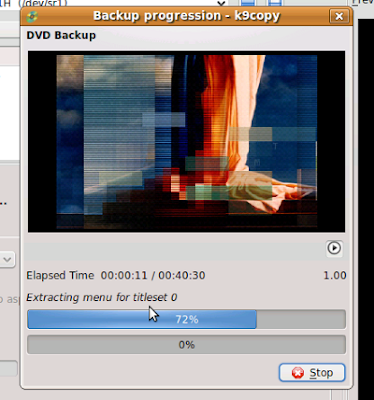
It will rip:


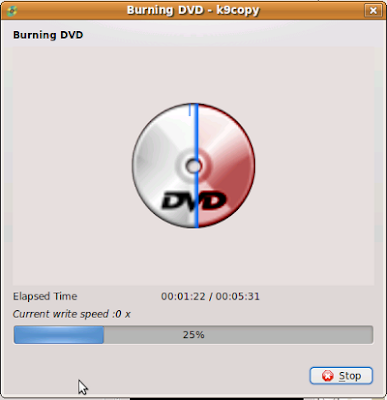
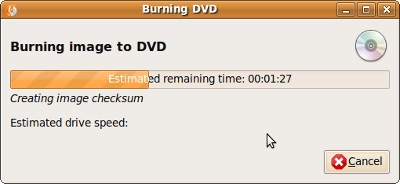
And save to an iso. Note when it's finished ripping the DVD, it will say "Burning DVD." It means: writing the ISO file. It's not actually burning anything. The terminology is misleading.


7. Click "Eject" in k9copy when it is done.


That's all for the iso. Remember where you saved the file. :)


Burning DVDs from iso file:

1. Insert a blank writable DVD disc. Again, cancel any popups, or set your preferences to "do nothing" when putting in media.

2. Click: Applications -> Sound & Video -> Brasero Disc Burner

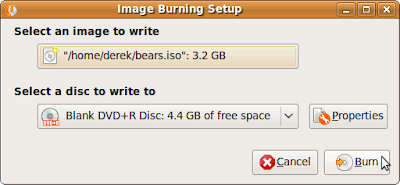
3. Click "Burn image"


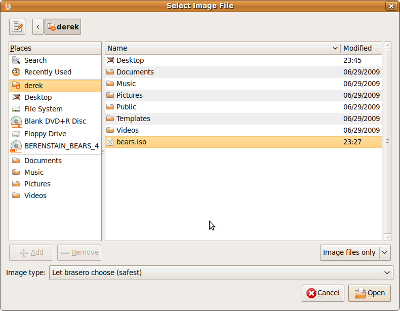
4. Click Select image, and browse to your file, click "open"


5. Click "burn."


This will burn it. On the drive I'm testing, it takes about ten minutes total.


And that's it. You have a DVD backup that should play in any standard player.

I also noticed if you right-click on an iso file, it will give the option of burning it to disc. I haven't used that feature, but I'm sure that would work as well. I just liked Brasero. If you get a warning that the disc was "corrupted" there's probably no need to pitch a disc and re-burn, unless the disc is completely unplayable. A few bad 1 and 0's out of 4GB of audio/video data probably won't be humanly detectable.

Saturday, July 4, 2009

Spearmint oil

I ran a first test batch distilling spearmint.

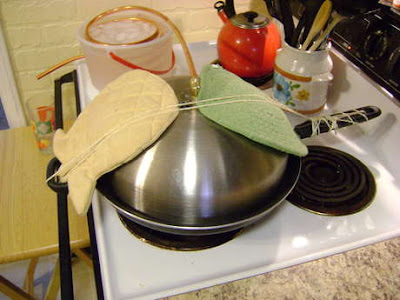
I packed the top of the lid with mint, and ran it for about a half hour on medium. I ended up tying the lid down on the home-made distiller, to prevent steam leaks. I packed this fairly tight, so it actually backed up a little pressure pushing the steam through the mint (less pressure to push through the sides).


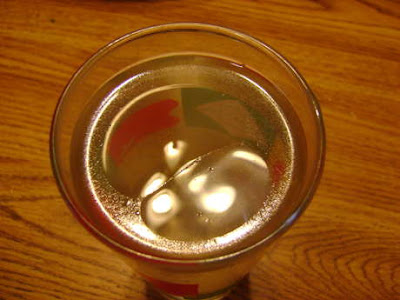
I just collected the distillate in a normal glass.

Really though, what would be ideal, would be a bottle with a very long, narrow neck, that could allow excess water to be drained off from the bottom. That way, the oil would separate cleanly, and not bead up. If it beads up, it's going to be hard to pull it off the top with a dropper.


The spearmint oil floating on top of the distillate. It's beading up. This would be enough to flavor several hundred toothpicks. Just dip the toothpicks in cup, and it will pick up the oil. It's extremely strong.

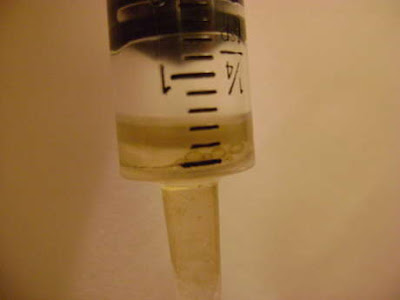
Also, I used a medicine dropper to pull up the oil, and ended up with 2 ml from one small bunch of spearmint. I suppose if I distilled all the mint, I'd end up with a small bottle. A little goes a long way though.


You'll need a little air in there to push the oil out (floating on top). You can discard the water (at bottom).

Drying spearmint

Spearmint will fill up the whole yard if you let it. It grows like crazy, and will choke just about everything else out.

The wall of mint. :)


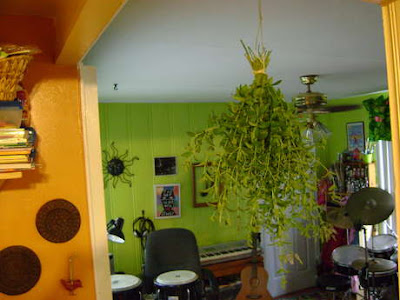
I cut handful to dry (cutting at least 2/3 of the plant off). I stripped off lower leaves, then tied them together with twine. Also, I flattened the bundle out (like a "Japan fan") so that it dries more evenly.

You want to cut it right as it's budding. That's when the essential oils are at the peak. In general, I think that's true of any herb. On mint, if you wait till it flowers, the plant will lose some of the potency. Also, you don't want to wait too long; the tiny seeds are are to some degree toxic (though I'm not sure how many you'd have to eat to get sick).

Also most things I've read recommend cutting it early in the day before the sunlight beats down on it. The light will reduce some of the essential oils.

Hang it upside-down away from sunlight in a well ventilated room. The oils in the stem will flow down into the leaves, when drying.


It takes a few days to dry.

Friday, July 3, 2009

Bulding an essential oil distiller

Well, I've finally built a simple steam distiller. I was kind of shocked at how much people are selling distillers for. I mean even the cheapest ones are like $300 - $400 dollars. Large ones are thousands.

Here's how to build an inexpensive steam distiller for about $20 (not including tools).

I'll use this on my massive spearmint garden -- maybe I will get a couple drips of essential oil to show for it :)

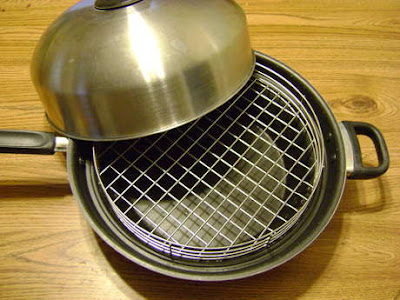
As the steamer, I used an old Turbo Cooker. You might be able to run across an old one for a couple bucks. Something like will work, because the metal tray will hold the mint just above the boiling water, and all the steam will pass through it. Excess water in the mint will just drip back down into the bottom.

Or you can find an old pressure cooker. Really pressure cookers are ideal as a base, because they are designed to seal tight, and have a hole at the top as well.


There then needs to be a way to cool the steam, so that it condenses into oil and hydrosol (the water part that is collected). The essential oil will float on top. Basically, just run tubing through ice water. Then the oil can be picked up with a dropper.

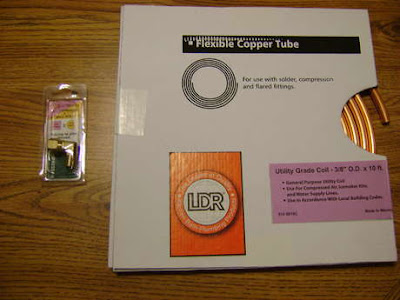
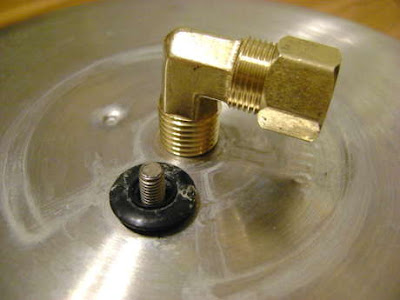
For tubing, I used 10 feet of 3/8" diameter copper tubing (used for ice makers, refrigerators). I got a 3/8" COMP x 1/4" MIP compression-elbow-fitting to connect it to the top. The copper pipe will fit snugly in one end, and I just planned on screwing the fitting into the top of the Turbo Cooker lid. This was about $15 (got it at a farm supply store Rural King).


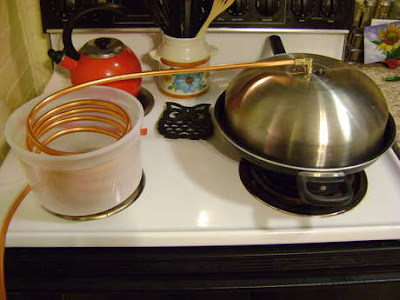
Then I used an old ice cream container, for cooling the steam. This will just be filled with ice-water, to cool the tubing:

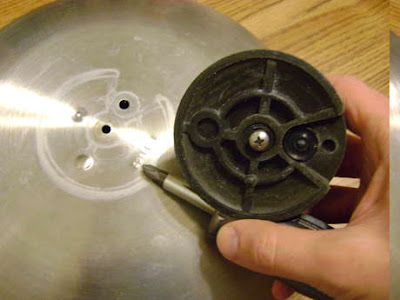
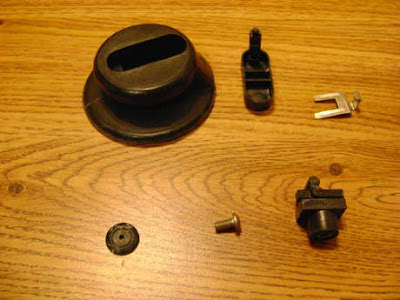
I took off the top, and there were two holes:


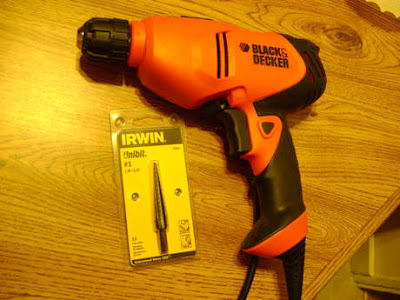
For the one in the center, I used a unibit to open it up to 15/32", so that the elbow fitting would screw in tightly. I really like the unibit, because you can just find the snug fit by trial and error. Plus it saved having to keep changing drill bits. I got this separately from a hardware store (Ace, or Harbor Freight is cheaper).


To plug the other hole, I cannibalized the top part, and pulled out a rubber washer and small bolt. (To dissemble, the whole top comes apart if you pull off the washer).

I used the unibit on the washer, so that it would thread tightly onto the bolt. I would have used rubber on more parts, but wasn't sure if what I saw in the store would take high temperatures without melting.


With both parts connected, the top basically looks like:


Again, I used the unibit to drill a 3/8" hole in the ice-cream container. I coiled the copper wire tighter by hand, just molding it into a helix with two long ends. After I fed it through the ice-cream container, I put a little silicone around the hole to seal it. This part will never come in contact with the oils; it's just for cooling (holding the ice-water). Also, of course, don't let the hot copper tube come in contact with the plastic. The copper and plastic are only touching at the bottom.

The tubing connects to the compression fitting like:


Here's the finished setup:


I will probably tie the lid down tighter with something fire-resistant. That will force most all the steam through the top. To prep it all, I just ran clean water through the tubing with the lid upside down and checked for any leaks. If there are any, I would just put nuts on both top/bottom side of the threads, with rubber washers that won't melt.

I'll run a test batch tomorrow. Most things I've read recommend drying plants before distilling though -- because you can put more plant material in the distiller. It's optional though. Also, it's probably worth noting that in terms of herbs in general: some extracts are fairly potent (meaning toxic) when concentrated. Extracts should be handled with care.

Of course, I imagine I could probably go online and buy a gallon of mint oil for the same price as the home-made distiller cost. Although I can produce all sorts of flavors now. :)